
How to Do a Voiceover on Google Slides? 3 Methods
In this post, you learn how to make your Google Slides presentations more interesting by adding voiceovers to them. Once you learn the method, you’d never miss adding them to your presentations.
If you’ve already produced a voiceover and want to include the audio file on a slide in your presentation, adding a voiceover to Google Slides presentations is simple. Google Slides does not come with built-in voiceover recording capabilities, so if you haven’t already produced a voiceover and want to record one, you’ll need to use another program.
On Google Slides, you can only insert audio files. The voiceover will need to be produced separately, then added to your presentation on Google Slides.
You can use a voice recorder, a screen recorder, and text-to-speech translation software to do a voiceover on Google Slides. Here are the detailed steps of each method:
Method 1: Do a Voiceover on Google Slides Using a Voice Recorder
The audio narration can be separately recorded and then added to your Google Slides presentation using this technique.
To record your voiceovers, you’d need the assistance of an external audio/video recording program since Google Slides doesn’t have a built-in audio recorder.
Online voice recorders are widely available. Rev, Audacity, 123Apps, GarageBand, and Vocaroo are some of the voice recording programs that are most widely used. To begin, pick any of these voice recording tools.
Step 1: Record Your Voiceovers
Prepare your script and try recording a few demo sessions after selecting your voice recording software. You can improve your videos with the help of these. You can record your voiceover whenever you’re ready and download it in either the mp3 or wav file format.
It’s crucial to download the audio files in the formats listed above because Google Slides does not support any other file types.
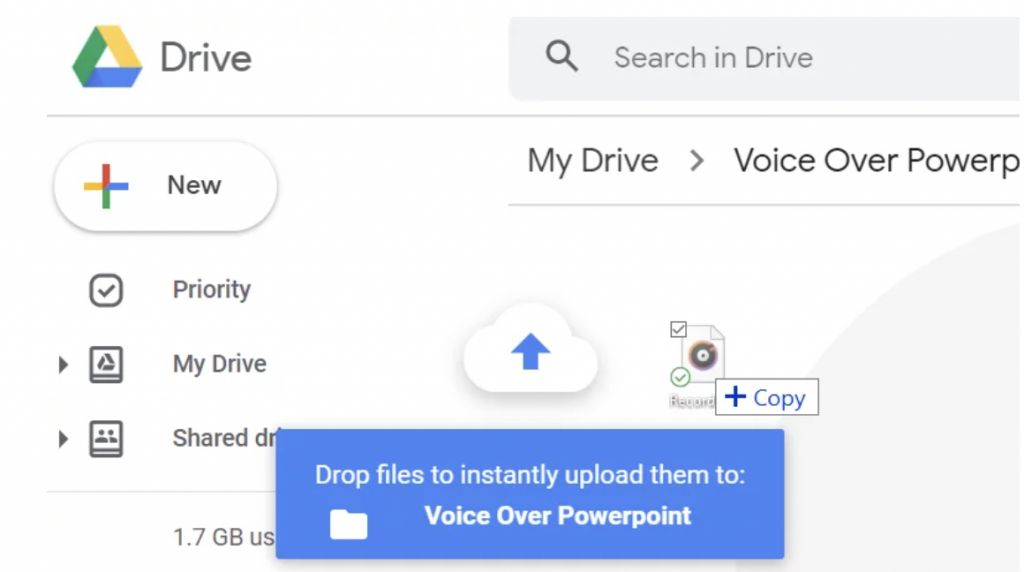
Step 2: Upload It to Google Drive
The audio recording is now ready for Google Drive upload.
- When prompted, choose “File Upload” when you click “New” in your Google Drive account after logging in.
- The file will be added to your Google Drive.
Step 3: Make the Audio File Accessible to Everyone
- You must make the audio file publicly available before adding it to your Google Slides presentations.
- To make it accessible to anyone online, right-click on your audio file, choose “Share,” and then click “Change to anyone with the link.”
- Click “Done” when you are finished.
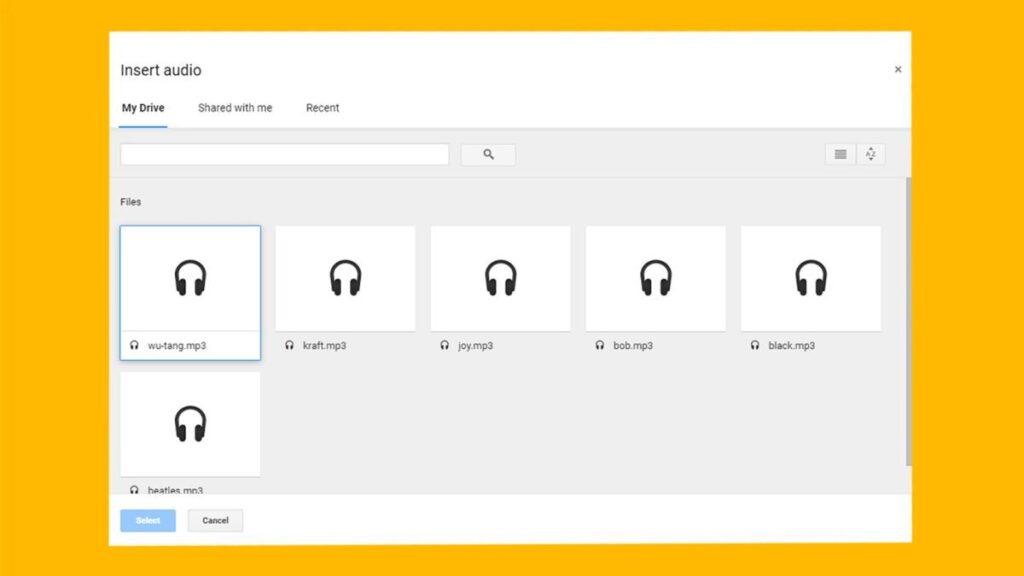
Step 4: Attach the Audio File to Google Slides
Your Google Slides presentation can now easily include the audio file. A slide in Google that requires a voiceover should be opened.
- Select “Audio” under the “Insert” option after clicking.
- Select the audio file you want to include by selecting it and then clicking the “Select” button.
- A speaker icon shows up on your slide once you’ve added your voiceovers to your Google slide presentation. You can hear the audio when you click on it.
- The speaker icon can also be moved around by dragging it.
Step 5: Configure Settings & Watch a Preview
You can customize your audio narrations using Google Slides. In the toolbar’s “Format” menu, select the speaker icon and then click the “Format option.” A pop-up box would be shown to you, allowing you to customize your preferences.
The most significant formatting choices on Google Slides are listed below.
- Play automatically: You can turn on the “start playing automatically” radio button to have the audio start playing as soon as you open the slide.
- Play on-click: The “start playing on click” radio button can be enabled if you only want the audio to start playing when you click the speaker icon.
- Loop audio: The “loop audio” checkbox can be enabled if you want the audio narration to play continuously.
- Stop on slide change: This “stop on slide change” checkbox can be enabled if you want the audio to pause while you move to the next slide.
Here is a video to help you understand the steps well:
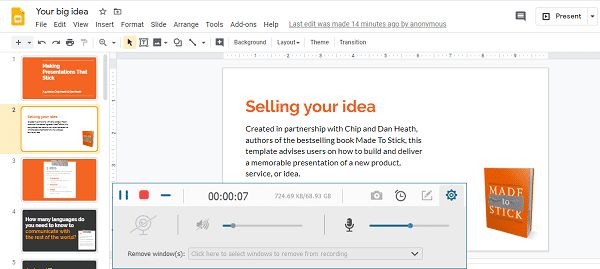
Method 2: Do a Voiceover on Google Slides Using a Screen Recorder
One of the simpler of the three methods is the second one.
It enables webcam overlay narrations so you can add voiceovers to your Google Slides presentations. You can freely share your presentation video with others once you’ve recorded it.
Online, you can find a ton of screen recording applications. You can pick whichever online screen recorder best suits your needs from the available options.
When you use a screen recorder to record your voiceovers, you’d be able to enhance your recording with screen annotations. Plus, as most screen recording software comes with a built-in editor, you can easily edit the unnecessary portions of your voiceovers in one go.
Note: Because Vmaker is so user-friendly and has so many useful features, we use it to walk you through this process.
Step 1: Sign Up for Vmaker
Visit the Vmaker website and register an account. Both a Mac application and a Chrome plugin are available for the screen recording software.
While the Mac application can be downloaded from Vmaker’s home page, the Chrome extension can be added to your Chrome browser from the “Chrome Web Store.”
For quick access to the screen recording software, the Chrome plugin can be pinned to your browser.
Step 2: Start Recording the Voiceover
Try performing a few practice runs before you begin the actual voiceover recording to ensure that you are at your best. Simply sign into your Vmaker account and select “start recording” to accomplish this.
Open the Google Slides presentation that needs a voice-over when you are ready to start recording in real-time and begin speaking over it.
To start recording the voiceover, click on the Vmaker icon on your browser and select ‘Start Recording‘.
Additionally, you can alter the features to suit your tastes.
Step 3: Edit & Share
Once you’ve recorded your voiceovers, you start your editing process by clicking on the ‘Edit’ button.
Your recording can be edited to remove any extraneous material using Vmaker’s built-in editing tools. Once you’re done editing, you can export the recorded video file in the desired file format and share it with anyone.
Additionally, Vmaker enables users to post their videos on websites like Facebook, YouTube, and Instagram. Therefore, content producers can quickly and easily upload their videos.
Method 3: Do a Voiceover on Google Slides Using a Text-to-speech Translation Software

If you don’t have the time to make your own voiceovers, this method might be very useful. You can use a text-to-speech program to create voiceovers and add them to Google Slides.
These voiceover programs can create realistic voiceovers just from text and are supported by artificial intelligence. This implies that you can quickly turn a voiceover script into a polished voiceover. Additionally, you can customize the tone, pitch, and breath of your voiceovers to suit your preferences. People can save a ton of time and money by doing this.
Online, there are many options for text-to-speech translation software. Some of the most popular ones are Animaker’s Voice, Speechelo, Logic, Studio One, etc. Any of these programs that best meet your needs can be selected.
Note: Utilizing Animaker’s Voice software, we walk you through this example.
Learn how to use a text-to-speech program to voiceover Google Slides now.
Step 1: Sign Up for Animaker
Visit the official Animaker website to register for Animaker. You would be taken to Animaker’s dashboard after signing up. To create voiceovers, you can click on the ‘Create’ button and select ‘Create Voice’ under the Section for projects that should be created.
Step 2: Type in the Text & Customize Your Preferences
You would now be taken to the Animaker’s voiceover studio. This is where you can add the text that needs to be voiced over.
- Customize your preferences after entering the text. Gender, language, and voice type are all selectable.
- By selecting the button below, you can additionally alter the voice-over’s pitch, speed, and volume.
- Simply click on the dot between two words to adjust the breaks between them to create a break effect or pause.
- There’s also a ‘Reset‘ button that lets you undo the changes you’ve made recently.
Step 3: Preview & Make Changes, If Necessary
Once you’ve entered the text and customized the preferences, you can click on ‘Preview‘ and check if the audio sounds good. If it needs further changes, just keep tweaking around the break and breath effects to achieve the desired results.
Step 4: Share/download the Recording
Once the voiceover is complete, you can share or download the audio to your computer.
Step 5: Upload to Google Drive & Attach the Audio File to Google Slides
Now that you’ve downloaded the audio file, you can easily add it to your Google Slides presentation. Just repeat the first method’s instructions to attach the audio file to your Google slides.
Incorporate the file you downloaded into your Google Slide presentation by uploading it to Google Drive and inserting it there.
Tips to Help You Get Started
To get you started with your recording process, here are a few pointers.
Use a Pop-up Filter
Typically, background noise is eliminated with a pop-up filter when recording voiceovers and other types of videos. Additionally, speaking quickly stops making popping noises.
To get the job done, you might need to invest in a good pop-up filter if you’re recording your voiceovers using either of the other two techniques.
Select a Quiet Place
It’s crucial to maintain concentration throughout the recording. Therefore, be sure to pick a place that is peaceful and free from many distractions. Turn off the notifications on your phone and let your family know in advance.
Watch Your Posture
Good breathing support and a strong, clear voice are both benefits of good posture when speaking. The best position to be in when recording voiceovers is to stand. Find a place where you can sit comfortably and straight if you’re going to be sitting.
Warm Up Your Voice
You can find the ideal tempo, volume, and projection for the voiceover by performing a few practices runs before the actual recording. Your need for retakes will be lessened as a result.
Have a Glass of Water Close By
To keep your vocal cords hydrated, it is always advisable to keep water or warm tea close by. Coffee, milk, and carbonated beverages should be avoided.
What Happens If I Don’t Split My Audio File before Integrating to Google Slides?
Imagine the issues that would arise during the presentation if someone interrupted to ask a question, requiring you to stop and respond.
And consider that the presentation’s audio is not interrupted. Therefore, it is best practice to divide your audio file into smaller chunks and keep them there in order to distinguish them according to each slide.
Utilizing smaller video chunks makes it simple to pause and resume audio. so, your presentation and voiceover will not be unsynchronized at any point.
Why Add Audio on Google Slides?
Because it enables you to improve your PowerPoint and Google Slides presentations, to put it simply. Voice-over files are phenomenally helpful for educational experiences because they:
- Bring additional context to whatever your slides present. Let’s say you have a Google Slide with a chart on it. The chart can be viewed, but the viewer might not be aware of how to interpret the data. A voice-over file can give the listener additional context or explain how to understand the chart.
- Enhance the quality of a Google Slides presentation. This can be crucial when trying to instruct a large group of students or, on the other hand, when trying to make a presentation that will impress your teacher.
- Allow your courses to be more interactive and accessible to more students. Consider the possibility of color blindness in some students. Even colorblind students can understand your remote lecture if you use a voice-over file to explain what a colored chart means.
Whether you teach a few online classes occasionally or are a full-time distance learner, adding audio to Google Slides presentations is simply too beneficial to ignore. Additionally, adding voice-over files to programs like Google Slides, PowerPoint, and others is not too difficult.
How to Do a Voiceover on PowerPoint?
Microsoft’s PowerPoint is a free productivity tool that functions very similarly to Google Slides.
Step #1 Insert Audio Clips
Go to PowerPoint and choose “Insert” to add your audio file(s) after recording your script as separate audio files.
Step #2 Adjust the Audio
Choose start to start your presentation either automatically or when you click the start button. However, it is advised that you select “automatically” so that your audio starts playing as soon as your slide loads.
Step #3 Share Your Presentation With Students
Using Graphy, select your file and distribute it to all of your students. To sell online courses that don’t only use conventional learning methods but have a variety of learning resources, just copy and paste the link onto their platform.
Conclusion: Start Recording Your Voiceovers!
Once you’ve done it once, recording a voice-over for your Google Slides and PowerPoint presentations is quick and easy. It’s likely that once you get your first few audio files up and running, you’ll be able to discuss the rest of the procedure and audio-enhance the entirety of your presentation.
Go ahead and start recording your voiceovers like a pro now that you’ve learned how to do a voiceover on Google Slides using 3 easy methods and are aware of the mistakes you shouldn’t be making.